Magento 2 Integration Guide
Who should read this:
The webmaster or developer with root-level access to Magento 2
Downloading the Extension
There are 2 extensions, one intended for Dev/Staging stores and one for Production
Make sure you install the correct one as well as using the corresponding Widget Scripts for each enviroment
Credentials such as API keys and Store ID's are enviroment specific. Make sure to use the correct ones for each enviroment
Download the Extension
- Production
https://cdn.shoppinggives.com/magento-2-extension/ChangeCommerce.Magento2.Extension.latest.zip
- Staging
Install the Extension
-
Copy the contents of the zip folder to {MagentoBasePath}/app/code/ChangeCommerce/Core (create the directories that do not exist; “app” should already exist, “code” may not, the rest definitely shouldn’t)
-
From the Magento Root Directory Run:
a. bin/magento setup:upgrade
b. bin/magento setup:static-content:deploy
From the Admin, navigate to Stores -> Configuration -> ChangeCommerce -> Setup
If you are able to do that, then the extension has been successfully installed!
Configure the Extension
-
From the Admin, navigate to Stores -> Configuration -> ChangeCommerce -> Setup
-
Provide the Store ID and API Key (Secret) provided to you previously
Run Consumers
In order to have a seamless experience for you and your customers, we defer all processing to services that run in the background.
Our suggestion is to run these as configurable services and not allow Magento’s CRON to start the consumers, but this is completely up to the developers maintaining this site.
We have 3 consumers: changecommerce_ordercreate, changecommerce_creditmemo, and changecommerce_order
If you need guidance on how to set up the consumers as services, continue on, otherwise you are done!
Setup Consumers as Services (Optional)
Order Creation:
Run: sudo nano /etc/systemd/system/changecommerce_ordercreate.service
Update, then paste the following:
[Unit]
Description=ChangeCommerce Create Order Consumer
After=network.target
StartLimitIntervalSec=0
[Service]
Type=simple
Restart=always
RestartSec=1
User=root
ExecStart={magentoCliLocation} queue:consumers:start changecommerce_ordercreate

[Install]
WantedBy=multi-user.target
To start the service run:
sudo systemctl enable changecommerce_ordercreate.service
Note
{magentoCliLocation} is usually {MagentoBasePath}/bin/magento but we don’t want to assume it for you. ALSO don’t put ExecStart should be a single line, the line wrapping here pushes it down.
Credit Memo:
Run: sudo nano /etc/systemd/system/changecommerce_creditmemo.service
Update, then paste the following:
[Unit]
Description=ChangeCommerce Credit Memo Consumer
After=network.target
StartLimitIntervalSec=0
[Service]
Type=simple
Restart=always
RestartSec=1
User=root
ExecStart={magentoCliLocation} queue:consumers:start changecommerce_creditmemo
[Install]
WantedBy=multi-user.target
Note
{magentoCliLocation} is usually {MagentoBasePath}/bin/magento but we don’t want to assume it for you. ALSO don’t put ExecStart should be a single line, the line wrapping here pushes it down.
To start the service run:
sudo systemctl enable changecommerce_creditmemo.service
Order Cancel:
Run:
sudo nano /etc/systemd/system/changecommerce_ordercancel.service
Update, then paste the following:
[Unit]
Description=ChangeCommerce Order Cancel Consumer
After=network.target
StartLimitIntervalSec=0
[Service]
Type=simple
Restart=always
RestartSec=1
User=root
ExecStart={magentoCliLocation} queue:consumers:start changecommerce_ordercancel
[Install]
WantedBy=multi-user.target
Note
{magentoCliLocation} is usually {MagentoBasePath}/bin/magento but we don’t want to assume it for you. ALSO don’t put ExecStart should be a single line, the line wrapping here pushes it down.
To start the service run:
sudo systemctl enable changecommerce_ordercancel.service
Widget Integration
Pre-Integration
A Store ID is required from ShoppingGives in order to render widgets. Please request this Store ID from your ShoppingGives representative.
Invite [email protected] to your development environment for development support purposes.
Global Tracking Script
Place script on every page in header tag (if not already done)
<script type="text/javascript" src="https://cdn.shoppinggives.com/cc-utilities/sgloader.js?sid=XXXXXXXXXX&test-mode=false"></script>
<script type="text/javascript" src="https://cdn.staging1.shoppinggives.com/cc-utilities/sgloader.js?sid=XXXXXXXXXX&test-mode=false"></script>
| Param | Type | Description | Required | Default |
|---|---|---|---|---|
| sid | Text | Store Id - Provided by ShoppingGives | Yes | n/a |
| test-mode | Bool | Toggles test mode on | No | false |
For Magento platform, in the admin page of the store.
Go to the Content -> Design Configuration
![]()
Click on the “Edit” function on the theme your store is using

Open the HTML Head settings and place the script in the “Scripts and Style Sheets” section.
![]()
PDP Page (Product Page)
1. Choose the style of widget you’d like to use:
a. Contained (https://cdn.shoppinggives.com/cc-utilities/contained-product.js)

b. Compact (https://cdn.shoppinggives.com/cc-utilities/compact-product.js)

c. Full (https://cdn.shoppinggives.com/cc-utilities/full-product.js)

2. Craft URL Parameters
| Param | Type | Description | Required | Default |
|---|---|---|---|---|
| sid | text | Store Id - Provided by ShoppingGives | Yes | n/a |
| price | text | Price of the current subitem | Yes | n/a |
| subitem-id | text | Identifier of the current subitem | Yes | n/a |
| target-element | text | CSS Selector value that dictates where you want the widget to go. | No | Without, it replaces script tag with widget html |
| after | bool | Append after target-element | No | false |
| before | bool | Append before target-element | No | false |
| debug | bool | Allows to turn on debug logging for the widget | No | false |
Please remove all optional URL parameters not being used.
3. Place the widget on the product pages
<script type="text/javascript" src="https://cdn.shoppinggives.com/cc-utilities/{product-widget-style}.js?sid={store-id-provided}&price={price-of-item}&subitem-id={identifier-for-specific-product-variant}"></script>
<script type="text/javascript" src="https://cdn.staging1.shoppinggives.com/cc-utilities/{product-widget-style}.js?sid={store-id-provided}&price={price-of-item}&subitem-id={identifier-for-specific-product-variant}"></script>
For Magento Platform, in order to place the script under or around the “Add To Cart” button it is necessary to access the store’s files.
It is beneficial to have knowledge of bash
Once in the root folder for the magento store, perform the following commands:
cd vendor
Find ./ -name addtocart.phtml
The “find” command should return the path to the file it is necessary to edit.
Perfom the following command :
cd the/path/returned/by/the/find/command
Once in the folder of the addtocart.phtml file we will need to edit the file.
There are many ways to edit a file in this case we will use vim since it comes already with the app by default, however if you are comfortable using nano or another text editor will work with the following steps too.
Perform the following command:
sudo vim addtocart.phtml
It should open the file in the terminal
At the top of the file, right under the button tittle add the following:
<?php $priceData = $_product->getPriceInfo()->getPrice('final_price')->getAmount()->getBaseAmount(); ?>
<?php $id = $_product->getId(); ?>
After adding it, you can add the widget script under the button:
<script type="text/javascript" src="https://cdn.shoppinggives.com/cc-utilities/{product-widget-style}.js?sid={store-id-provided}&price=<?=$priceData?>&subitem-id=<?=$id?>"></script>
<script type="text/javascript" src="https://cdn.staging1.shoppinggives.com/cc-utilities/{product-widget-style}.js?sid={store-id-provided}&price=<?=$priceData?>&subitem-id=<?=$id?>"></script>
Once you added the widget you are safe to save the file and flush the Cache of the page. It should start showing the widget on any product page.
This will make the same widget show in every product page. In order to have it render only on products you choose there is extra steps.
Pre-Conversion (Cart / Checkout Page)
1. Choose the style of widget you’d like to use:
a. Contained (https://cdn.shoppinggives.com/cc-utilities/contained-cart.js)

b. Compact (https://cdn.shoppinggives.com/cc-utilities/compact-cart.js)

c. Full (https://cdn.shoppinggives.com/cc-utilities/full-cart.js)

2. Craft URL Params
| Param | Type | Description | Required | Default |
|---|---|---|---|---|
| sid | Text | Store Id - Provided by ShoppingGives | Yes | n/a |
| target-element | Text | CSS Selector value that dictates where you want the widget to go. | No | Replaces script tag with widget html |
| after | Bool | Append after target-element | No | false |
| before | Bool | Append before target-element | No | false |
| debug | Bool | Allows to turn on debug logging for the widget | No |
3. Prepare the Cart Page for Custom Content
Add the below code in checkout_index_index.xml file at app\code\Vendor\Module\view\frontend\layout.
<?xml version="1.0"?>
<page xmlns:xsi="http://www.w3.org/2001/XMLSchema-instance"
      xsi:noNamespaceSchemaLocation="urn:magento:framework:View/Layout/etc/page_configuration.xsd">
    <body>
        <referenceContainer name="content">
            <block class="Magento\Framework\View\Element\Template" name="custom_text_summary"
                   template="Vendor_Module::checkout/custom_content.phtml"/>
        </referenceContainer>
    </body>
</page>
Then create a new file at app\code\Vendor\Module\view\frontend\templates\checkout.
Naming it custom_content.phtml and add the following code:
<?php
$objectManager = \Magento\Framework\App\ObjectManager::getInstance();
$cart = $objectManager->get('\Magento\Checkout\Model\Cart');
$allItems = $cart->getQuote()->getAllItems();
?>


<script type="text/javascript">

    if (!window.cc_cart_items) { window.cc_cart_items = [] }

    <?php foreach($allItems as $item) :?>
        window.cc_cart_items.push({ id: '<?=$item-> getItemId();?>', price: '<?= $item->getPriceInfo()->getPrice('final_price')->getAmount()->getBaseAmount();?>', quantity: 1, discount: 0 });
    <?php endforeach;?>
    window.customText = '<?php echo __('<script type="text/javascript" src="https://cdn.shoppinggives.com/cc-utilities/contained-cart.js?sid=ab123456-c78d-9ef0-g1h2-345i678j90k1></script>'); ?>';
</script>
<?php
$objectManager = \Magento\Framework\App\ObjectManager::getInstance();
$cart = $objectManager->get('\Magento\Checkout\Model\Cart');
$allItems = $cart->getQuote()->getAllItems();
?>


<script type="text/javascript">

    if (!window.cc_cart_items) { window.cc_cart_items = [] }

    <?php foreach($allItems as $item) :?>
        window.cc_cart_items.push({ id: '<?=$item-> getItemId();?>', price: '<?= $item->getPriceInfo()->getPrice('final_price')->getAmount()->getBaseAmount();?>', quantity: 1, discount: 0 });
    <?php endforeach;?>
    window.customText = '<?php echo __('<script type="text/javascript" src="https://cdn.staging1.shoppinggives.com/cc-utilities/contained-cart.js?sid=ab123456-c78d-9ef0-g1h2-345i678j90k1></script>'); ?>';
</script>
Add in the bottom to grand-total.html theme file located at app\design\Theme\Theme_Name\Magento_Tax\view\frontend\web\template\checkout\summary.
<tr class="grand totals">
    <div data-bind="html: customText"></div>
</tr>
Post-Conversion
- Add Url Params to https://cdn.shoppinggives.com/cc-utilities/conversion.js
| Param | Type | Description | Required | Default |
|---|---|---|---|---|
| sid | Text | Store Id - Provided by ShoppingGives | Yes | n/a |
| oid | Text | Order ID. Must be the same as the webhook sends | Yes | n/a |
2.Place the widget on the confirmation at vendor/magento/module-inventory-in-store-pickup-frontend/view/frontend/templates in the file success.phtml
<script type="text/javascript" src="https://cdn.shoppinggives.com/cc-utilities/conversion.js?sid={store-id-provided}&oid=<?=$block->getOrderId()?>"></script>
<script type="text/javascript" src="https://cdn.staging1.shoppinggives.com/cc-utilities/conversion.js?sid={store-id-provided}&oid=<?=$block->getOrderId()?>"></script>
Styles and Customization
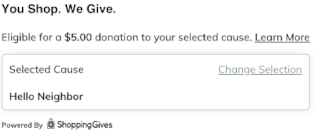
You can use the CSS editor to customize the appearance of our widget with any style sheet or by leveraging our CSS Editor in the Impact Portal.
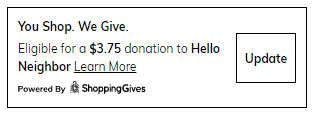
Style Fields for the Compact Widget Style:
-
To modify the eligibility tag main text, target class id sg-main-text to provide the stylings (don't forget to use !important)
-
If you have to fix the logo size, target class id powered-by-logo
Style Fields for the Contained Widget Style:
-
To modify the eligibility tag description, target class id sg-text-wrap to provide the stylings (don't forget to use !important)
-
To modify the main title, target the id cc-shop-give to provide the stylings (don't forget to use !important)
-
If you have to fix the logo size, target class id powered-by-logo
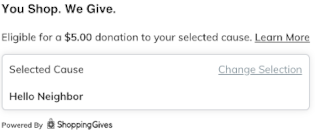
Style Fields for the Full Widget Style:
-
To modify the main title, target the id sg-title to provide the stylings (don't forget to use !important)
-
To modify the eligibility tag description, target class id sg-text-wrap to provide the stylings (don't forget to use !important)
-
If you have to fix the logo size, use class id sg-powered-by-wrap.
Testing the Integration
Note When Testing
Ensure that test mode URL parameters on the tracking script is set to “true”
- Running a test purchase – Expected outcome:
a. Make a Test Purchase: Take note of the donation amount listed and cause supported before checkout.
i. Confirm the donation amount shown pre-purchase on the widget is 1% of the amount (pre-tax, pre-shipping, post discount)
b. Post-conversion: After a successful conversion the customer will be shown the post-conversion share modal. Use this modal to verify the correct donation amount and cause are displayed.
i. Confirm the donation amount shown post-purchase on the modal is 1% of the amount (pre-tax, pre-shipping, post discount), and the same amount shown pre-purchase
c. Testing with Coupon Code: Repeat step “a.” with the use of a coupon code that updates the price of the order. Ensure that the donation amount dynamically updates before the purchase is completed and that the donation amount post-purchase reflects the same amount shown pre-purchase.
- Check for z-index, global typeface, padding settings to ensure that the widget is displayed optimally.
Updated almost 3 years ago
