React Widgets Integration Guide
Implementation of the ShoppingGives React widget on an e-commerce website.
Who should read this:
The webmaster or developer with HTML/CSS -level access to the e-commerce website.
Pre-Integration
-
A Store ID is required from ShoppingGives in order to render widgets. Please request this Store ID from your ShoppingGives representative.
-
Invite [email protected] to your development environment for development support purposes.
Basic Instructions
A complete implementation of the ShoppingGives widget involves adding it to an e-commerce website.
- Widget Implementation
c. Pre-Conversion (Cart / Checkout Page)
e. Sale Webhook
- Once these pieces of code are added to the e-commerce website the new implementation can be tested.
Note:
If you use a Content Management System to manage your e-commerce website, check with your ShoppingGives rep for a CMS-specific implementation guide. This guide is generic and does not take any CMS into account.
| Param | Type | Description | Required | Default |
|---|---|---|---|---|
| sid | text | Store Id - Provided by ShoppingGives | Yes | n/a |
| test-mode | bool | Toggles test mode on | No | false |
Global Tracking Script
Place the script below to your HTML pages, including the cart & checkout pages.
<script type="text/javascript" src="https://cdn.shoppinggives.com/cc-utilities/sgloader.js?sid=XXXXXXXXXX&test-mode=true"></script>
When you are ready to start tracking donations, remove the test-mode param or set it equal to false
PDP Page (Product Page)
- Add the product widget component to your codebase
import React, { Component } from 'react';

const SgProductWidget = ({ sgProductWidgetRef }) => (
    <div ref={sgProductWidgetRef} className="sg-product-widget"></div>
)

class SgProductWidgetContainer extends Component {
    constructor(props) {
        super(props);
        this.sgProductWidgetRef = React.createRef();
    }

    componentDidMount() {
        const { sid, subItem, template } = this.props;

        if (!window.sgProductControllers) {
            const script = document.createElement("script");
            script.src = `https://cdn.shoppinggives.com/cc-utilities/${template}-product.js?sid=${sid}&price=${subItem.price}&subitem-id=${subItem.id}&target-element=.sg-product-widget`;
            script.async = true;
            document.body.appendChild(script);
        } else {
            window.sgProductControllers[0].run(true);
        }
    }

    componentDidUpdate(prevProps) {
        if (prevProps.subItem.id != this.props.subItem.id) {
            window.sgProductControllers[0].setSubitem(this.props.subItem.id, this.props.subItem.price);
        }
    }

    render() {
        return <SgProductWidget sgProductWidgetRef={this.sgProductWidgetRef} />;
    }
}

export default SgProductWidgetContainer;
- Choose the style of widget you’d like to use:
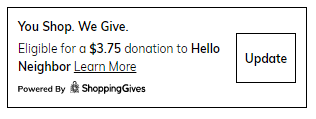
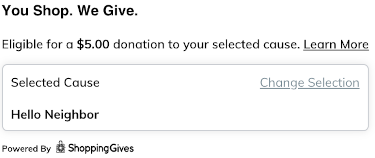
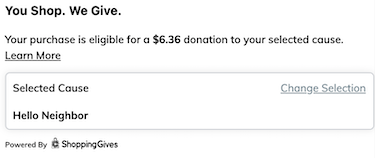
a. Contained (default)

b. Compact

c. Full

- Add the component to the product pages.
SgProductWidgetContainer widget properties
| Prop | Type | Description | Required | Default |
|---|---|---|---|---|
| storeId | string | Store Id - Provided by ShoppingGives (can be hardcoded) | Yes | n/a |
| subItem | SubItem | SubItem object | Yes | n/a |
| template | string | Options are “contained”, “full”, “compact” (can be hardcoded) | No | “contained” |
SubItem properties
| Prop | Type | Description | Required | Default |
|---|---|---|---|---|
| price | string | Price of the current subitem | Yes | n/a |
| id | string | Identifier of the current subitem | Yes | n/a |
import { useState } from 'react';
import SgProductWidgetContainer from './sg-product-widget';

const MyApp = () => {
   const [subItem, setSubItem] = useState({ id: '123', price: '9.99' });

   const handleOnClick = () => {
       let newId = (parseInt(subItem.id) + 1).toString();
       let newPrice = (Math.random() * 10).toString();

       setSubItem({ id: newId, price: newPrice });
       console.log(subItem);
   }

   return (
       <SgProductWidgetContainer
           sid={storeId}
           subItem={subItem}
           template={template}
       />
       <button onClick={handleOnClick}>Update</button>
   )
}
NOTE:
If a product has multiple variants (e.g. size, color, etc) and the sub-item Id is not defined yet, you can populate “subitemId” with the first variant’s ID.
- Confirm the donation amount shown on product pages is dynamically changing based on the product value.
Pre-Conversion (Cart / Checkout Page)
- Add the card widget component to your codebase
import React, { Component } from 'react';

const SgCartWidget = ({ sgCartWidgetRef }) => (
    <div ref={sgCartWidgetRef} className="sg-cart-widget"></div>
);

class SgCartWidgetContainer extends Component {
    constructor(props) {
        super(props);
        this.sgCartWidgetRef = React.createRef();
    }

    componentDidMount() {
        const { sid, template, lineItems } = this.props;
        window.cc_cart_items = lineItems;

        if (!window.sgCartControllers) {
            const script = document.createElement("script");
            script.src = `https://cdn.shoppinggives.com/cc-utilities/${template}-cart.js?sid=${storeId}&target-element=.sg-cart-widget`;
            script.async = true;
            document.body.appendChild(script);
        } else {
            window.sgCartControllers[0].run(true);
        }
    }

    componentDidUpdate(prevProps) {
        if (prevProps.lineItems != this.props.lineItems) {
            window.cc_cart_items = this.props.lineItems;
            window.sgCartControllers[0].refreshCart();
        }
    }

    render() {
        return <SgCartWidget sgCartWidgetRef={this.sgCartWidgetRef} />;
    }
}

export default SgCartWidgetContainer;
- Choose the style of widget you’d like to use:
a. Contained (default)

b. Compact

c. Full

- Place the widget code on the cart/checkout pages
SgCartWidgetContainer component properties
| Prop | Type | Description | Required | Default |
|---|---|---|---|---|
| storeId | string | Store Id - Provided by ShoppingGives (can be hardcoded) | Yes | n/a |
| template | string | Options are “contained”, “full”, “compact” (can be hardcoded) | No | “contained” |
| cart | CartItem[] | List of cart items | n/a |
CartItem properties
| Prop | Type | Description | Required | Default |
|---|---|---|---|---|
| id | string | Id of the cart item (subitem / variant id) | Yes | n/a |
| price | string | Price of the cart item | Yes | n/a |
| quantity | int | Quantity of the cart item | Yes | n/a |
| discount | string | Discount on the cart item | Yes | n/a |
import { useState } from 'react';
import SgCartWidgetContainer from './sg-cart-widget';

const MyApp = () => {
    const [cart, setCart] = ([
        { id: '123', price: '9.99', quantity: 2, discount: '9.99' },
        { id: '9876', price: '4.99', quantity: 1, discount: '0' }
    ]);

    return (
        <SgCartWidgetContainer
            sid={storeId}
            template={template}
            lineItems={cart}
        />
    );
}
- Confirm the donation amount shown on cart and checkout pages is dynamically changing based on the value of the cart, pre-tax, pre-shipping, post-discounts.
Post-Conversion
-
Check CMS Specific documentation. CMS steps may vary based on specific CMS requirements. Please request your specific CMS integration guide if you have not received it.
-
Add Url Params to https://cdn.shoppinggives.com/cc-utilities/conversion.js
| Param | Type | Description | Required | Default |
|---|---|---|---|---|
| sid | text | Store Id - Provided by ShoppingGives | Yes | n/a |
| oid | text | Order ID. Must be the same as the webhook sends | Yes | n/a |
Please remove all optional URL Params not being used
- Place the widget on the confirmation (post-conversion / thank you) page
Styles and Customization
You can customize the appearance of our widget by targeting the desired selector and providing the stylings.
Don't forget to use !important when overriding our CSS
To edit the container to add padding, target class main-element.
Style Fields for the Compact Widget Style:
- To modify the eligibility tag main text, target id sg-main-text
- If you have to fix the logo size, target class powered-by-logo
Style Fields for the Contained Widget Style:
- To modify the eligibility tag description, target class sg-text-wrap
- To modify the main title, target the class cc-shop-give
- If you have to fix the logo size, target class powered-by-logo
Style Fields for the Full Widget Style:
- To modify the main title, target the id sg-title
- To modify the eligibility tag description, target class sg-text-wrap
- If you have to fix the logo size, use class sg-powered-by-wrap
Testing the Integration
Ensure that the test-mode URL parameter on the tracking script is set to “true”.
- Running a test purchase – Expected outcome:
a. Make a Test Purchase: Take note of the donation amount listed and cause supported before checkout.
i. Confirm the donation amount shown pre-purchase on the widget is 1% of the amount (pre-tax, pre-shipping, post discount)
b. Post-conversion: After a successful conversion the customer will be shown the post-conversion share modal. Use this modal to verify the correct donation amount and cause are displayed.
i. Confirm the donation amount shown post-purchase on the modal is 1% of the amount (pre-tax, pre-shipping, post discount), and the same amount shown pre-purchase
c. Testing with Coupon Code: Repeat step “a.” with the use of a coupon code that updates the price of the order. Ensure that the donation amount dynamically updates before the purchase is completed and that the donation amount post-purchase reflects the same amount shown pre-purchase.
-
Check for z-index, global typeface, padding settings to ensure that the widget is displayed optimally.
-
Remove “True” from the Global Tracking script URL to turn off test mode prior to activating the application.
Sale Webhook
Please reference your specific CMS integration requirements:
Updated almost 3 years ago
