Storefront Widgets Integration Guide for ETL
Implementation of the ShoppingGives widget on an e-commerce website.
Who should read this:
The webmaster or developer with HTML/CSS -level access to the e-commerce website.
Pre-Integration
-
A Store ID is required from ShoppingGives in order to render widgets. Please request this Store ID from your ShoppingGives representative.
-
Request your store-specific Amazon S3 bucket URI's from your ShoppingGives representative. This is where you will provide order data. We will provide both staging and production environment URI's.
-
With each file transmission, please attach a summary record of the number of records contained, date-time stamp, and the domain associated with it.
-
With each file transmission, please use the following naming convention format:
.
└── sales/clientdirectory/
	├── clientdomain.com-summary-1-2021-11-05T13:16:20Z
	├── clientdomain.com-1-2021-11-05T13:16:20Z
└── returns/clientdirectory/
  ├── clientdomain.com-summary-1-2021-11-05T13:19:10Z
  └── clientdomain.com-1-2021-11-05T13:19:10Z
- Confirm the frequency on the delivery of these files with your ShoppingGives representative.
**Example: Every day at 5:00:00pm EST
Implementing the ShoppingGives widgets
A complete implementation of the ShoppingGives widget involves adding it to an e-commerce website.
- Widget Implementation
-
Upon completion of the storefront integration process and placement of widgets, please reference our ETL Data Transfer Process to complete the integration process.
-
Once steps one and two are completed the new implementation can be tested.
Note
This storefront widget integration guide is intended for merchants providing sales data to ShoppingGives via an ETL Data transfer process.
Global Tracking Script
Place the Global Tracking Script tag within the element on the page you want it to execute.
The script tag should be non-blocking (async=true or defer=true) to ensure there is no negative impact on page load speed.
The Global Tracking Script must be included as a 1st party cookie in order for ShoppingGives to enable collecting donations.
<script type="text/javascript" src="https://cdn.shoppinggives.com/cc-utilities/sgloader.js?sid=XXXXXXXXXX&test-mode=true"></script>
<script type="text/javascript" src="https://cdn.staging1.shoppinggives.com/cc-utilities-universal/sgloader.js?sid=XXXXXXXXXX&test-mode=true"></script>
| Param | Type | Description | Required | Default |
|---|---|---|---|---|
| sid | text | Store Id - Provided by ShoppingGives | Yes | n/a |
| test-mode | bool | Toggles test mode on | No | false |
Accessing and Storing Tracking ID
-
The ShoppingGives Tracking ID is automatically created and stored by the Global Tracking Script
-
The Tracking ID is stored as a base-64 encoded string within the browser's sessionStorage object
-
The Tracking ID can be retrieved from sessionStorage via the following JavaScript function:
getTrackingId(storeId: string): string {
    try {
        let result;
        let normalizedStoreId = storeId.replace(/-/g, '').toLowerCase();

        try {
            result = sessionStorage.getItem('sg.sid-' + normalizedStoreId);
        } catch {
            if ( < any > window.name) {
                return atob( < any > window.name);
            }
        }

        if (result) {
            return atob(result);
        } else if ( < any > window.name) {
            // failed to retrieve from session storage, tracking is set to a    backup window variable in the case it fails to set to session
            return atob( < any > window.name);
        } else {
            return null;
        }
    } catch (e) {
        // log error
        return null;
    }
}
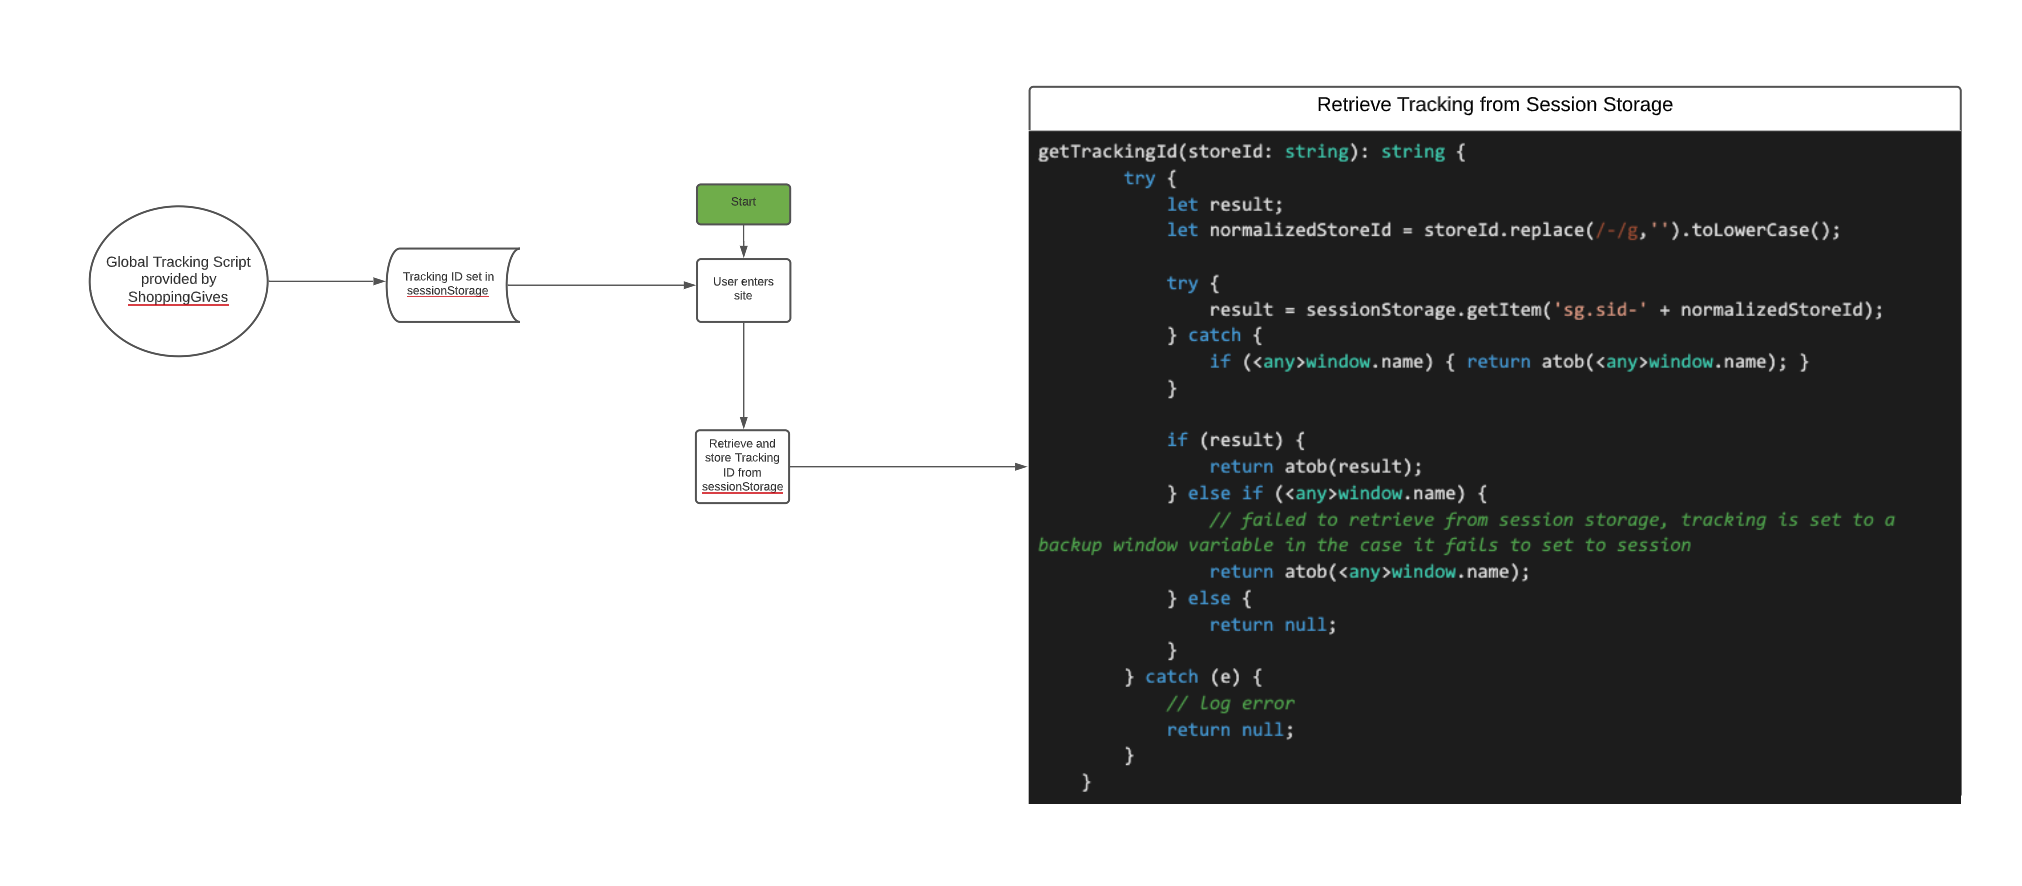
Retrieving Tracking from Session Storage
PDP Page (Product Page)
1. Choose the style of widget you’d like to use:
a. Contained (https://cdn.shoppinggives.com/cc-utilities/contained-product.js)

b. Compact (https://cdn.shoppinggives.com/cc-utilities/compact-product.js)
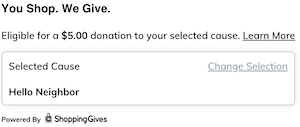
c. Full (https://cdn.shoppinggives.com/cc-utilities/full-product.js)

2. Craft URL Parameters
| Param | Type | Description | Required | Default |
|---|---|---|---|---|
| sid | text | Store Id - Provided by ShoppingGives | Yes | n/a |
| price | text | Price of the current subitem | Yes | n/a |
| subitem-id | text | Identifier of the current subitem | Yes | n/a |
| target-element | text | CSS Selector value that dictates where you want the widget to go. | No | Without, it replaces script tag with widget html |
| after | bool | Append after target-element | No | false |
| before | bool | Append before target-element | No | false |
| debug | bool | Allows to turn on debug logging for the widget | No | false |
Please remove all optional URL parameters not being used.
3. Place the widget on the product pages
<!-- TEMPLATE -->

<script type="text/javascript" src="https://cdn.shoppinggives.com/cc-utilities/{product-widget-style}.js?sid={store-id-provided}&price={price-of-item}&subitem-id={identifier-for-specific-product-variant}"></script>
<!-- EXAMPLE -->

<script type="text/javascript" src="https://cdn.shoppinggives.com/cc-utilities/contained-product.js?sid=ab123456-c78d-9ef0-g1h2-345i678j90k1&price=98.76&subitem-id=SUBITEM123"></script>
Note
If a product has multiple variants (e.g. size, color, etc) and the sub-item Id is not defined yet, you can populate “subitem-id” with the first variant’s ID.
4. Handle updating of subitem on the page
a. On subitem change, run:
window.sgProductControllers[0].setSubitem('{subitem-id}', {price});
window.sgProductControllers[0].setSubitem('SUBITEM123', 98.76);
5. Confirm the donation amount shown on product pages is dynamically changing based on the product value.
Pre-Conversion (Cart / Checkout Page)
1. Choose the style of widget you’d like to use:
a. Contained (https://cdn.shoppinggives.com/cc-utilities/contained-cart.js)
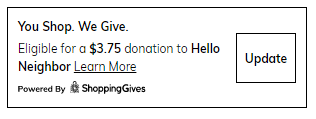
b. Compact (https://cdn.shoppinggives.com/cc-utilities/compact-cart.js)

c. Full (https://cdn.shoppinggives.com/cc-utilities/full-cart.js)
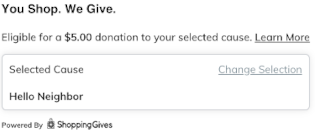
2. Create a hidden CSS Element “amount” to target for dynamic donation on cart and checkout.
a. “Amount” is the term used to describe line items minus discounts, pre-tax, pre-shipping(this is the value we calculate donations based on).
For example, with a $100.00 subtotal and 10% off coupon, $4.99 Shipping, and $3.00 tax, “amount” would calculate to $90.00
3. Craft URL Params
| Param | Type | Description | Required | Default |
|---|---|---|---|---|
| sid | text | Store Id - Provided by ShoppingGives | yes | n/a |
| target-element | text | CSS Selector value that dictates where you want the widget to go. | yes | Replaces script tag with widget html |
| after | bool | Append after target-element | no | false |
| before | bool | Append before target-element | no | false |
| debug | bool | Allows to turn on debug logging for the widget | no |
Please remove all optional URL parameters not being used.
4. Place the widget code on the cart/checkout pages
<!-- TEMPLATE -->

<script type="text/javascript" src="https://cdn.shoppinggives.com/cc-utilities/{cart-widget-style}.js?sid={store-id-provided}&target-element={css-selector-value}"></script>
<!-- EXAMPLE -->

<script type="text/javascript" src="https://cdn.shoppinggives.com/cc-utilities/contained-cart.js?sid=ab123456-c78d-9ef0-g1h2-345i678j90k1></script>
5. Add Cart Items:
<!-- TEMPLATE -->

if (!window.cc_cart_items) { window.cc_cart_items = [] }

// Foreach Item
window.cc_cart_items.push({ id: '{itemId}', price: {price}, quantity: {quantity}, discount: {discount} });
6. Update all carts:
if(window.sgCartControllers) {
   for (var x = 0; x < window.sgCartControllers.length; x++) {
      window.sgCartControllers[x].refreshCart();
   }
}
a. On cart change (item removed, quantity changed, etc), retry refresh all carts.
b. Once the cart page is loaded and cc_cart_items array is populated, check if the cart controllers are null. If the cart controllers are NOT null, then you'll call refreshCart() to update its current state.
c. Handle Cart Discount changes – You can change this by applying the discount to each product yourself and ignoring the cart level discount
if(window.sgCartControllers) {
   for (var x = 0; x < window.sgCartControllers.length; x++) {
       window.sgCartControllers[x].setDiscount({cart discount});
   }
}
Confirm correct donation amounts displayed:
Confirm the donation amount shown on cart and checkout pages is dynamically changing based on the value of the cart, pre-tax, pre-shipping, post-discounts.
D. Confirm the donation amount shown on cart and checkout pages is dynamically changing based on the value of the cart, pre-tax, pre-shipping, post-discounts.
E. Create an order with discounted items and proceed to checkout, once on checkout page, open the inspector and navigate to the Network tab. Under the network tab filter on “shoppinggives” – within the results, find “get-multiple-donations” response and navigate to “Headers” sub-menu.
Each line item should display the SKU as the “id”, the Price being the original pre-discounted price, and the discount by line-item:
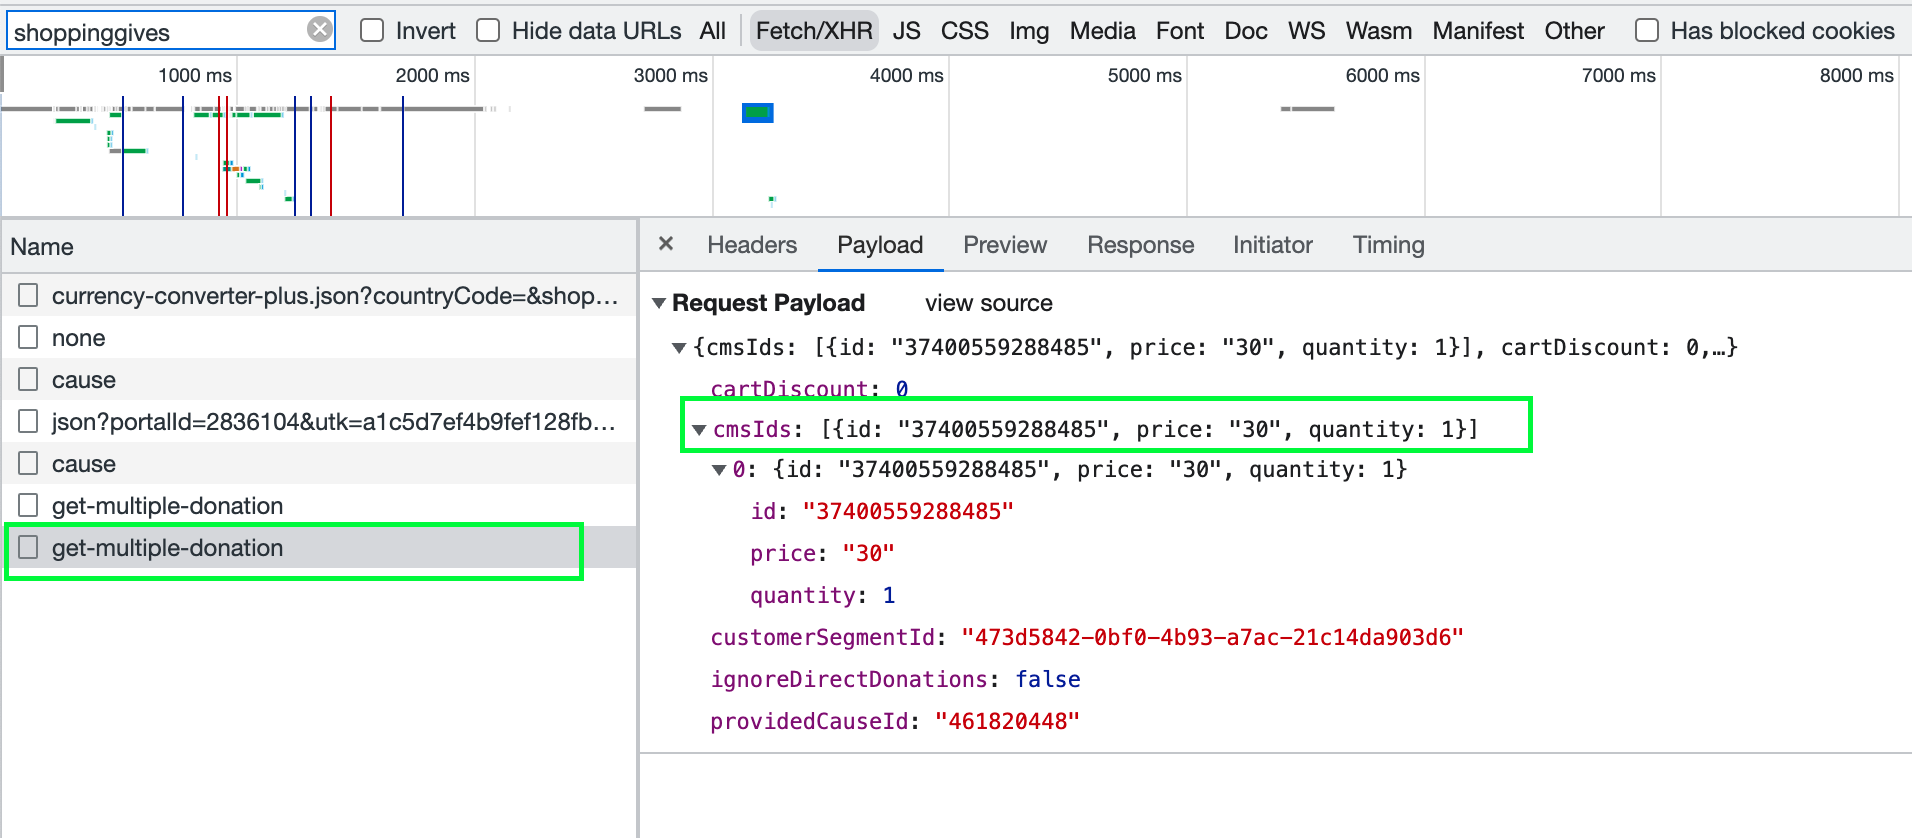
Confirming Discounts and Line Item Values
Note, if multiple items of the same SKU are added to the cart, if an applicable discount is valid, the discount should be doubled for that specific line item. Ensure that cart-wide discounts are applied to either a single line item or evenly across both line items.
Order Confirmation
- Craft URL Parameters to https://cdn.shoppinggives.com/cc-utilities/conversion-embed.js
| Param | Type | Description | Required | Default |
|---|---|---|---|---|
| sid | text | Store Id - Provided by ShoppingGives | Yes | n/a |
| embed-target | text | CSS Selector value that dictates where you want the widget to go. | Yes | Replaces script tag with widget html |
- Place the widget on the order confirmation page (post-conversion / thank you page)
<script type="text/javascript" src="https://cdn.shoppinggives.com/cc-utilities/conversion-embed.js?sid={store-id-provided}&embed-target={embed-target-element}"></script>
<script type="text/javascript" src="https://cdn.staging1.shoppinggives.com/cc-utilities-universal/conversion-embed.js?sid={store-id-provided}&embed-target={embed-target-element}"></script>
Styles and Customization
You can use the CSS editor to customize the appearance of our widget with any style sheet or make updates to CSS within ShoppingGives merchant portal under "Experience" > "Customize CSS". It is better to make the customization on the theme’s main style sheet.
Style Fields for the Compact Widget Style:
-
To modify the eligibility tag main text, target class id sg-main-text to provide the stylings (don't forget to use !important)
-
If you have to fix the logo size, target class id powered-by-logo
Style Fields for the Contained Widget Style:
-
To modify the eligibility tag description, target class id sg-text-wrap to provide the stylings (don't forget to use !important)
-
To modify the main title, target the id cc-shop-give to provide the stylings (don't forget to use !important)
-
If you have to fix the logo size, target class id powered-by-logo
Style Fields for the Full Widget Style:
-
To modify the main title, target the id sg-title to provide the stylings (don't forget to use !important)
-
To modify the eligibility tag description, target class id sg-text-wrap to provide the stylings (don't forget to use !important)
-
If you have to fix the logo size, use class id sg-powered-by-wrap.
Process Sales Data with ETL File Transfer
Upon completion of the storefront widget integrations, please continue to the next step "ETL Data Transfer Process" to provide sales data in order to process sales and donations.
Updated over 3 years ago
